
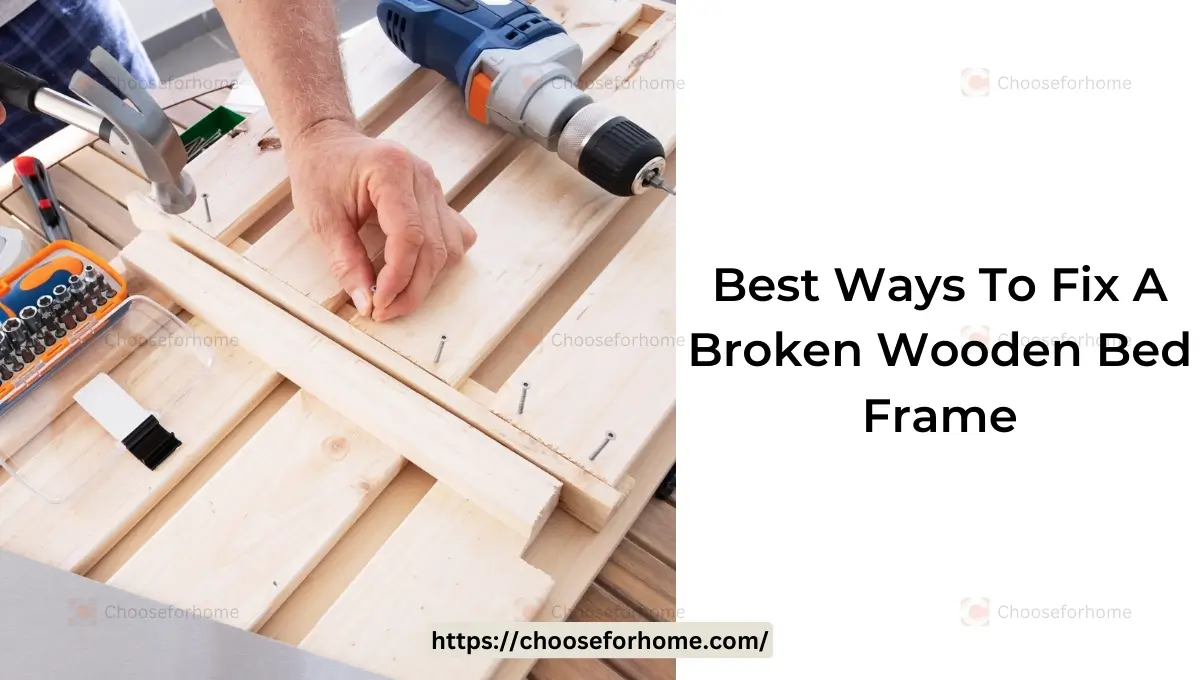
Wooden bed frames are stylish and sturdy, but they can break due to various reasons. Whether caused by an accidental impact, prolonged use, or a manufacturing defect, a broken bed frame is more than just an inconvenience—it poses safety risks and can lead to further damage if not addressed promptly.
In this comprehensive guide, we’ll walk you through the steps to fix a broken wooden bed frame. By the end, you’ll be equipped with the knowledge to repair your bed frame efficiently and effectively.
Common Reasons Why Wooden Bed Frames Break
Understanding why your bed frame broke in the first place can help you prevent future issues. Here are some common causes:
Wear And Tear
Over time, even the sturdiest wooden bed frames can succumb to wear and tear. Regular use puts strain on joints and connections, causing them to weaken and eventually break. Factors such as the weight of the mattress and occupants, frequent movement, and shifting can exacerbate wear and tear.
Additionally, environmental influences like humidity and temperature fluctuations can cause the wood to expand and contract, further stressing the structure and leading to cracks or splits in the wood. Regular maintenance can help mitigate these effects, but inevitable aging of the frame may still occur.
Accidental Damage
Accidental damage is another common reason for a broken wooden bed frame. This can occur due to sudden impacts or undue pressure on the frame. For instance, jumping on the bed, shifting heavy furniture, or dropping heavy objects can cause cracks, splits, or even break parts of the frame entirely. Such incidents are often unpredictable and can lead to immediate and visible damage, necessitating prompt repairs to restore the bed frame’s stability and safety.
Manufacturing Defects
Manufacturing defects, although less common than wear and tear or accidental damage, can also lead to a broken wooden bed frame. Such defects may arise from subpar materials, inadequate craftsmanship, or flaws in the design of the bed frame. For instance, if the wood used in the frame is not properly treated or dried, it may be more prone to cracking or warping.
Similarly, if joints and connections are not securely fastened or aligned during assembly, they might fail under pressure, resulting in breaks or instability. Detecting these issues can be challenging until they manifest as significant damage, but recognizing them is crucial for ensuring lasting repairs and preventing recurrent problems.
Improper Assembly
Improper assembly is another significant factor that can contribute to a broken wooden bed frame. If the frame is not put together correctly, it can lead to instability and weakened joints. Common issues include using the wrong screws, failing to tighten bolts sufficiently, or misaligning parts during construction.
These assembly errors can create uneven stress distribution across the frame, making it more susceptible to breaking under load. Ensuring that all parts are correctly aligned and securely fastened during the initial assembly is crucial to maintaining the integrity and longevity of the bed frame.
Importance of Fixing a Broken Wooden Bed Frame
Leaving a broken bed frame unfixed can lead to several problems:
Safety Hazards
A broken bed frame poses significant safety risks. Firstly, the structural instability can lead to sudden collapses, which may cause injury to anyone using the bed at the time. Splintered wood and sharp edges can also lead to cuts and scrapes.
Additionally, a compromised bed frame can result in the mattress shifting or sagging, leading to poor sleep quality and potential back pain. Addressing these hazards promptly is essential to ensure the safety and well-being of everyone who uses the bed.
Further Damage
Neglecting to repair a broken wooden bed frame can lead to more extensive damage over time. The initial crack or split in the wood can spread, exacerbating the structural weakness and potentially causing more parts of the frame to break.
Moreover, the instability can place uneven pressure on the bed slats and joints, leading to their premature wear and possible failure. This domino effect of damage can eventually render the bed unusable and necessitate a complete replacement, which is far more costly than timely repairs.
Comfort Issues
A broken bed frame can significantly impact comfort levels. The instability of the frame can result in an uneven sleeping surface, leading to discomfort and restless nights. Additionally, a compromised frame may cause the mattress to sag or shift, which can lead to poor spinal alignment and, consequently, back or neck pain.
This lack of support can detract from the overall sleep quality, making it essential to address any repairs promptly to restore a comfortable and supportive sleeping environment. The purpose of this article is to provide you with a step-by-step guide to repairing a broken wooden bed frame, ensuring your safety and comfort.
Common Types Of Damage
Before you begin the repair, identify the type of damage:
Cracks And Splits
Cracks and splits are among the most common types of damage in wooden bed frames. These occur when the wood fibers separate due to stress, impact, or environmental factors. Cracks are typically linear fractures that can extend along the grain of the wood, while splits are more severe and can divide a piece of wood into distinct sections.
Both cracks and splits weaken the structural integrity of the bed frame and can worsen over time if not addressed. Promptly repairing these issues by reinforcing the affected areas and using wood glue or fillers can help restore the frame’s stability and prevent further deterioration.
Broken Joints And Connections
Broken joints are a common issue in wooden bed frames that can severely compromise their structural integrity. Joints are the connecting points where different parts of the frame meet, such as corners, headboards, and footboards. Over time, the constant pressure and movement can cause these joints to weaken and eventually break.
This breakage can lead to parts of the bed frame becoming loose or detached, making the bed wobbly and unstable. To repair broken joints, it is crucial to resecure the connections using wood adhesive, screws, or additional reinforcements, ensuring the frame regains its stability and strength.
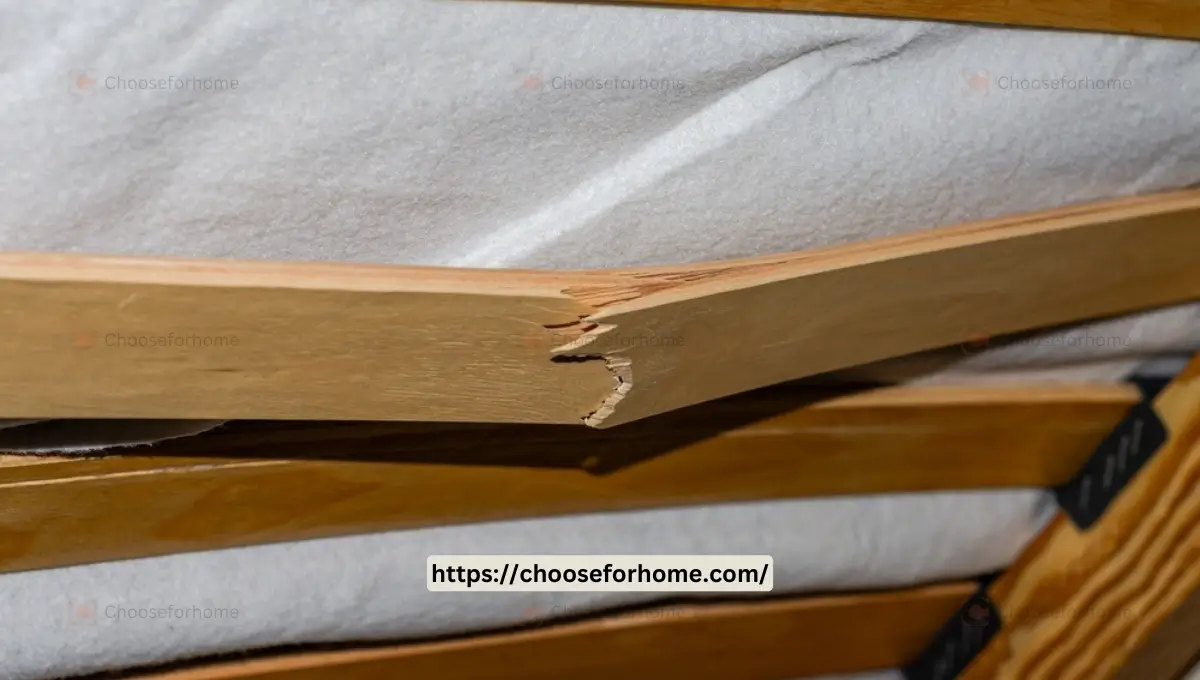
Broken Wood Pieces
Broken wood pieces are a significant form of damage that can affect the overall structural integrity of a wooden bed frame. These pieces can result from severe impacts or prolonged stress, causing sections of the wood to snap or splinter off entirely. Unlike cracks or splits, broken wood pieces often leave noticeable gaps or missing sections in the frame, leading to considerable instability.
Repairing broken wood pieces typically involves reattaching the fragments using strong adhesives like wood glue or employing joinery techniques to fill in the gaps with new wood inserts. Properly addressing these repairs is vital to restore the bed frame’s support and ensure its long-term durability.
Safety Precautions
Wear Protective Gear
When repairing a broken wooden bed frame, it is important to prioritize safety by wearing appropriate protective gear. This includes safety goggles to shield your eyes from wood dust and splinters, gloves to protect your hands from cuts and abrasions, and a dust mask to prevent inhalation of wood particles.
If you are using power tools, consider wearing ear protection to avoid potential hearing damage. By taking these precautions, you can minimize the risk of injury and work more effectively on your repair project.
Work In A Well-Ventilated Area
When repairing a broken wooden bed frame, it is essential to work in a well-ventilated area. This precaution helps to ensure that you are not exposed to potentially harmful fumes from adhesives, wood glue, or any other chemicals you might use during the repair process.
Proper ventilation reduces the concentration of airborne particulates, making it safer to sand and cut wood without inhaling large amounts of dust. An open window, fan, or working outdoors are all effective ways to maintain good airflow, thereby enhancing both your safety and comfort as you complete your repairs.
Use Tools Properly
Using tools properly is crucial to ensure safety and achieve effective repairs. Each tool should be used according to its specific purpose, and it’s important to follow the manufacturer’s instructions. For instance, use a screwdriver to drive screws, a hammer for nails, and clamps to hold pieces together securely.
Ensure that all tools are in good working condition and that blades are sharp to avoid slips or accidents. Misusing tools or using them incorrectly can lead to damage to the bed frame or personal injury. Taking the time to understand and handle your tools correctly will promote a smoother and safer repair process.
Necessary Tools And Materials To Fix A Broken Wooden Bed Frame
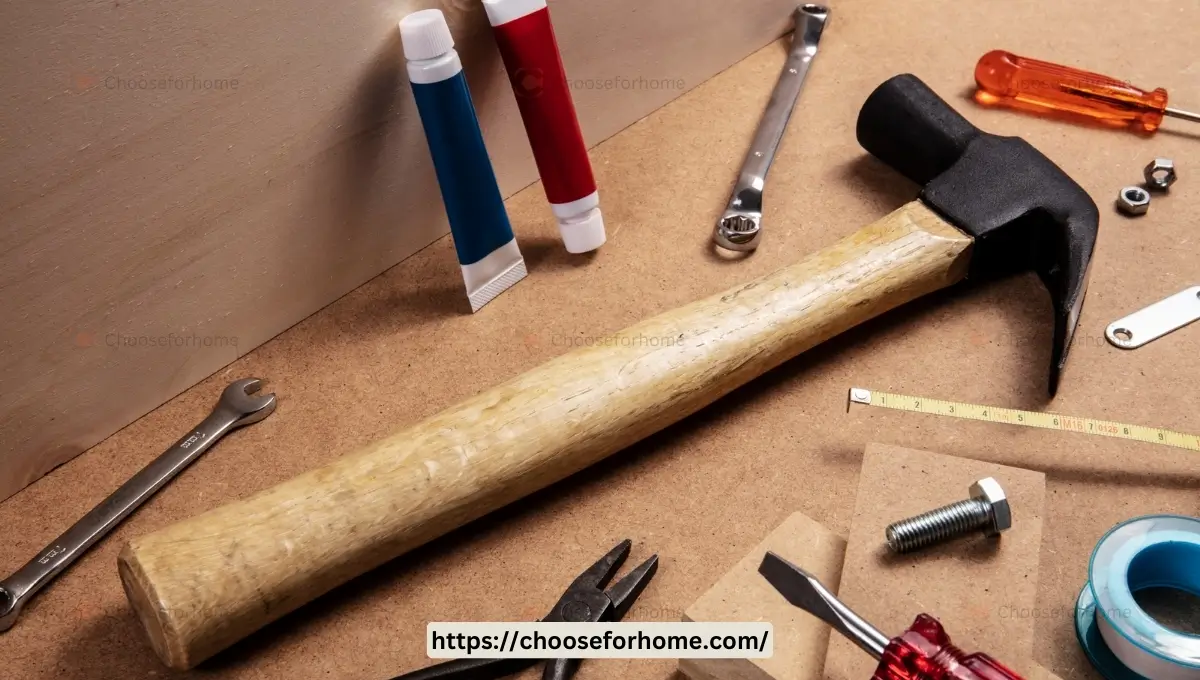
Here’s what you’ll need:
- Wood glue
- Clamps
- Sandpaper
- Replacement wood pieces (if necessary)
- Screws and a screwdriver
- Wood filler
- Paint or stain (for finishing)
Prepare For Repair
Disassemble The Bed Frame
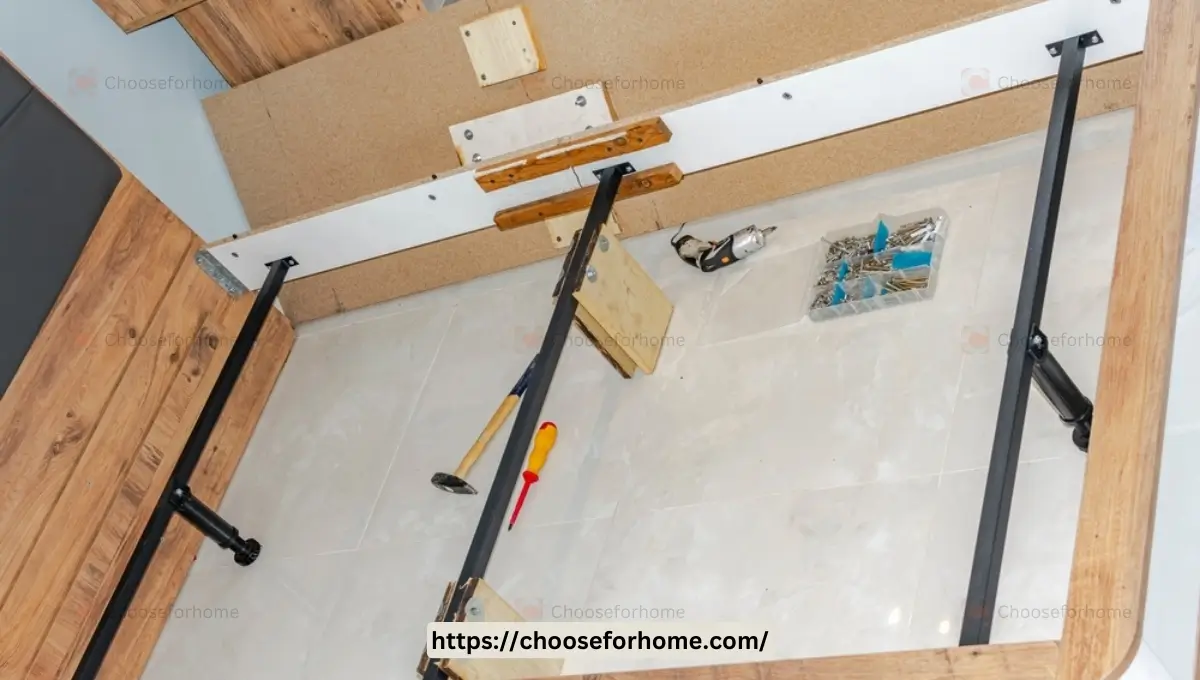
Properly disassembling the bed frame is the first step in the repair process. Follow these steps to ensure a safe and efficient disassembly:
-
- Remove the Mattress and Bedding: Take off all bedding, pillows, and the mattress, and place them in a safe, clean area.
-
- Unscrew the Slats: Use a screwdriver to remove any screws holding the bed slats in place. Carefully take out the slats and set them aside.
-
- Detach the Headboard and Footboard: Locate the screws or bolts that attach the headboard and footboard to the frame. Use a screwdriver or wrench to remove these fasteners and gently lift the headboard and footboard away.
-
- Disassemble the Side Rails: Remove any screws, bolts, or brackets securing the side rails to the headboard and footboard. Once detached, carefully take apart the side rails.
-
- Label and Store Hardware: Keep all screws, bolts, and small hardware pieces in a labelled container to ensure you can easily reassemble the bed frame later.
Clean The Damage Area
Before initiating any repairs on the wooden bed frame, it’s imperative to clean the damaged area thoroughly. Use a soft brush or a vacuum to remove any loose debris, dust, or wood splinters from the affected site. For any remaining finer particles, a damp cloth can be used to wipe down the surface.
Ensure it is clear of any contaminants that might interfere with the adhesion of wood glue or filler. Allow the area to dry completely before proceeding with the repair, as moisture can negatively impact the effectiveness of adhesives and other materials used in the restoration process.
Find The Damage Areas
Identifying the damaged areas of your wooden bed frame is a critical step before commencing repairs. Begin by thoroughly inspecting each component, including the headboard, footboard, side rails, and slats. Look for obvious signs of damage such as cracks, splits, or broken pieces.
Pay particular attention to joints and connection points, as these are common areas for wear and tear. If possible, apply gentle pressure to test for any instability or wobbling that might indicate underlying issues. By accurately pinpointing all areas needing repair, you can ensure that you address every problem and restore the bed frame’s overall integrity efficiently.
Repair Methods For Cracks and Splits
Apply Wood Glue
Applying wood glue is a straightforward and effective method for repairing cracks and splits in a wooden bed frame. Begin by ensuring the damaged area is clean and dry. Apply a generous amount of wood glue directly into the crack or split, ensuring it penetrates deeply into the crevice.
Use a small brush or your finger to spread the glue evenly if necessary. Once the glue is applied, press the cracked sections together firmly and secure them with clamps. Allow the glue to dry completely according to the manufacturer’s instructions, usually for several hours or overnight. Once dry, remove the clamps and check for stability. If needed, lightly sand the repaired area to achieve a smooth finish.
Clamp The Area
After applying wood glue to the cracks or splits in the wooden bed frame, it is crucial to clamp the area to ensure a strong, stable bond. Position the clamps so that they hold the glued sections tightly together, maintaining consistent pressure across the entire joint.
Be careful not to overtighten, as this could cause additional damage or disfigurement to the wood. Leave the clamps in place for the duration recommended by the wood glue manufacturer, often several hours or overnight, to allow the adhesive to cure fully. Once the glue has dried, carefully remove the clamps and inspect the repair to ensure it is secure and seamless.
Sand and Finish
Once the glue has dried and the clamps are removed, it’s time to sand and finish the repaired area to restore the bed frame’s smooth surface and aesthetic appeal. Start by using medium-grit sandpaper to gently sand the glued sections, ensuring any excess glue and rough edges are smoothed out. Progress to fine-grit sandpaper for a softer, more refined finish.
Wipe away any dust with a clean, damp cloth before applying your chosen wood finish. You can use paint, stain, or varnish depending on the original finish of the bed frame. Apply the finish evenly using a brush or cloth, following the manufacturer’s instructions, and allow it to dry completely before reassembling the bed frame. This process not only enhances the appearance but also provides an added layer of protection to the repaired wood.
Fixing Methods For Broken Joints
Disassemble The Joint
Disassembling a broken joint on your wooden bed frame is necessary to facilitate a proper and lasting repair. Begin by carefully examining the joint to understand how it was initially assembled, as this will guide you through the disassembly process. Look for any visible screws, nails, or dowels holding the joint together.
Use an appropriate tool, such as a screwdriver or a hammer and nail puller, to remove these fasteners without causing further damage to the wood. If the joint is glued, gently pry it apart using a flat tool like a putty knife or a screwdriver, applying slow, steady pressure to avoid splitting the wood.
Once separated, clean any old glue residue and debris from both surfaces of the joint, ensuring they are smooth and ready for reassembly. Label any small components or hardware removed during this process to ensure you can easily reattach them later. Properly disassembling the joint sets the stage for a precise and robust repair, returning the bed frame to its original strength and functionality.
Reapply Glue
To effectively reapply glue during the repair of a broken joint, start by ensuring both surfaces of the joint are clean and free of any old adhesive or debris. Apply a generous amount of wood glue to one side of the joint, making sure it covers the entire surface evenly. It’s essential to spread the glue thoroughly to avoid gaps, which can weaken the bond.
Once the glue is applied, press the joint components together firmly, ensuring they align correctly. For optimal results, secure the joint with clamps, applying consistent pressure to maintain a tight fit while the glue dries. Follow the drying time recommended by the wood glue manufacturer, typically allowing several hours or overnight for a complete cure.
Once the glue is fully dry, remove the clamps and inspect the joint to ensure it is secure and stable. Any excess glue that seeped out during clamping can be carefully removed with a chisel or sanded smooth to maintain the bed frame’s appearance.
Reassemble And Clamp
After ensuring that the glue has been completely applied to the joint and has started to set, the next step is to reassemble the joint and apply appropriate clamps to secure it. Carefully align the joint components, making sure all edges and surfaces fit together perfectly.
Gently press the pieces together, using your hands initially to achieve an appropriate fit and ensure that the joint is correctly aligned. Once aligned, use clamps to hold the joint securely in place. Position the clamps so that pressure is evenly distributed across the joint, ensuring a tight and stable connection. Be mindful not to overtighten the clamps, as excessive pressure can damage the wood or shift the joint out of alignment.
Allow the glued joint to dry fully while clamped, following the drying time specified by the glue manufacturer, which is often several hours or overnight. Once the glue has completely dried, remove the clamps carefully and inspect the joint to confirm that it is secure and strong. Properly reassembling and clamping the joint is essential in restoring the integrity and durability of the bed frame.
Reinforce The Joint
Reinforcing the joint is a crucial step to ensure the long-term stability and durability of your bed frame. Begin by selecting appropriate reinforcement materials such as wood screws, metal brackets, or dowels, depending on the nature of the joint and the level of support required.
For a wood screw reinforcement, pre-drill pilot holes to prevent the wood from splitting, and then drive in the screws, ensuring they are countersunk to sit flush with the wood surface. If using metal brackets, position them at the corners of the joint, securing them with screws for added strength.
Alternatively, dowels can be used by drilling matching holes in both joint components, applying glue to the dowels, and inserting them snugly into the holes to lock the joint together. No matter the method chosen, the goal is to distribute the stress across the joint evenly, reducing the risk of future breaks or loosening.
After reinforcement, double-check the overall alignment and fit of the joint, making any necessary adjustments before finishing the repair. This added reinforcement offers extra security and longevity to your bed frame.
Replace Broken Wood Pieces
Measure And Cut
Accurate measuring and cutting are critical steps in replacing broken wood pieces on your bed frame. Begin by carefully measuring the dimensions of the broken piece that needs replacement using a reliable measuring tape or a ruler. Take note of the length, width, and thickness of the original piece to ensure the replacement fits perfectly within the existing structure.
After recording the measurements, select a suitable piece of wood that matches the type and grain of the original to maintain consistency in appearance and strength. Next, transfer the measurements to the new piece of wood, marking the cut lines clearly with a pencil. Use a straight edge or a carpenter’s square to ensure the lines are accurate and straight.
When cutting the wood, choose the appropriate saw for the task, such as a handsaw, circular saw, or jigsaw, depending on the intricacy and precision required. Cut slowly and steadily along the marked lines to avoid splintering or damaging the wood. After cutting, sand the edges of the new piece to smooth out any roughness and ensure a clean fit when installed. By following these steps diligently, you can achieve a precise cut that will seamlessly integrate with the rest of your bed frame, restoring its structural integrity and aesthetic appeal.
Attach the New Piece
Once the new piece of wood is accurately measured, cut, and sanded, you are ready to attach it to the bed frame. Start by applying a generous layer of wood glue to all contact surfaces of the replacement piece, ensuring an even distribution to create a strong bond.
Carefully align the new piece with the existing structure, checking that all edges and surfaces fit snugly without any gaps. Press the piece firmly into place, ensuring it is properly seated. Next, secure the piece temporarily with clamps to maintain alignment and contact while the glue dries.
Position the clamps evenly to avoid putting undue pressure on any single point, which could misalign the piece or damage the wood. Allow the glue to set according to the manufacturer’s instructions, typically several hours or overnight, ensuring the bond is fully cured. If additional reinforcement is required, use wood screws, nails, or dowels for added stability.
Pre-drill pilot holes if using screws or nails to prevent splitting the wood, and countersink them to sit flush with the surface. For dowels, drill corresponding holes in the bed frame and the new piece, applying glue to the dowels before inserting them.
Finally, once the glue is dry and any supplemental fasteners are in place, remove the clamps and inspect the new piece to make sure it is secure and properly integrated into the bed frame. Smooth any excess glue with a chisel or sandpaper to ensure a clean finish. Properly attaching the new piece guarantees both the structural strength and aesthetic cohesion of the bed frame.
Sand And Finish
Sanding and finishing are the final steps to restore your bed frame’s appearance and ensure it feels smooth to the touch. Begin by sanding the repaired or replaced sections to achieve a uniform surface. Use medium-grit sandpaper to start, removing any rough edges, excess glue, and tool marks from the wood. Sand in the direction of the wood grain to avoid creating scratches.
Once the surface is even, switch to fine-grit sandpaper for a smooth finish, making sure to blend the new wood with the existing parts to create a seamless transition. After sanding, thoroughly clean the area with a tack cloth or vacuum to remove all dust and debris, which ensures the finish will adhere properly.
Choose an appropriate finish that matches the rest of your bed frame, such as stain, varnish, or paint. If staining, apply the stain with a brush or rag, following the grain of the wood, and wipe off excess to achieve the desired color. Allow the stain to dry completely before applying a clear sealer or varnish to protect the wood.
For a varnish or paint finish, apply a thin, even coat using a brush or roller, being careful to avoid drips or bubbles. Allow the first coat to dry according to the manufacturer’s instructions, lightly sanding between coats with fine-grit sandpaper to ensure a smooth, professional-quality finish.
Apply additional coats as needed to achieve your preferred level of protection and aesthetic. Finally, once the finish is completely dry, inspect the bed frame for any areas that may need touch-ups or additional sanding. By carefully sanding and finishing your bed frame, you can restore its beauty and ensure it remains a durable and integral part of your bedroom for years to come.
Finishing Touches
Review The Repair Area
After completing the repair, it’s essential to review the work area to ensure that everything is secure and properly aligned. Begin by carefully inspecting the joint and replaced wood pieces for any signs of instability or gaps that may have developed during the drying and finishing processes.
Check all fasteners, including screws, nails, and dowels, to verify they are firmly in place and have not loosened. Lightly press and wiggle the repaired sections to test their sturdiness. Finally, examine the surface finish to ensure that it is smooth and free of imperfections. Making a thorough review ensures that the bed frame is both aesthetically pleasing and structurally sound, providing peace of mind and extending the life of the piece.
Reassemble The Bed
With the repairs complete and the finish applied, it’s time to reassemble the bed. Begin by placing the bed frame components in their approximate positions, ensuring you have all screws, bolts, and washers ready for assembly. Start with the larger components such as the headboard and footboard, positioning them upright and aligning any pre-existing holes or slots.
Secure the side rails to the headboard and footboard by inserting bolts or screws through the aligned holes. Use a wrench or screwdriver to tighten them, making sure they are snug but not over-tightened to avoid damaging the wood. If your bed frame includes additional supports, such as center beams or slats, install these next by following the manufacturer’s instructions.
Place slats or beams evenly along the frame to distribute weight evenly for maximum support. Once the primary structure is assembled, double-check all connections for stability, ensuring that there are no wobbles or loose components. Tighten any fasteners as needed.
Finally, reattach any decorative elements or fittings that were removed prior to the repair, ensuring they are securely in place. Carefully place your mattress and box spring back on the frame, ensuring they are centred and properly supported by the slats or base.
With your bed fully reassembled, give it a final check for sturdiness by gently pressing on different areas to confirm the repairs and reassembly were successful. Your bed is now ready for use, restored to its full functionality and beauty.
Maintenance Tips For A Wooden Bed Frame
Proper maintenance is crucial for extending the life and appearance of your bed frame. Regular care ensures that the frame remains sturdy, safe, and visually appealing. By periodically checking for loose screws, joints, and any signs of wear or damage, you can address minor issues before they become significant problems.
Additionally, dusting and cleaning the bed frame will help preserve its finish and prevent the buildup of dirt and grime. Implementing a routine maintenance schedule not only prolongs the bed frame’s lifespan but also guarantees a restful, comfortable night’s sleep for years to come. To keep your bed frame in top condition follow those maintenance tips:
Regular Inspections
Performing regular inspections of your bed frame is essential for maintaining its integrity and appearance. Start by examining the frame for any signs of wear, such as cracks, scratches, or loose joints. Check all the screws, bolts, and fasteners to ensure they are tightened securely, and make any necessary adjustments.
Pay special attention to high-stress areas where the frame supports the most weight. By routinely inspecting your bed frame, you can catch and address minor issues early, preventing them from developing into more significant problems that could compromise the bed’s stability and comfort.
Tighten Screws And Bolts
Tightening screws is a crucial step in maintaining the stability and safety of your bed frame. Over time, screws can gradually loosen due to regular usage, which can lead to wobbling, creaking, and ultimately, structural failures. By routinely checking and tightening screws, you ensure that all parts of the bed frame remain securely fastened, preventing movement that could cause wear and tear or additional damage. This simple maintenance task not only extends the life of your bed frame but also guarantees a sound and restful sleep environment.
Avoid Overloading
Avoiding overloading your bed frame is crucial for maintaining its structural integrity and ensuring its longevity. Overloading can place excessive stress on the joints and support elements, leading to potential damage or failure. To prevent this, always adhere to the manufacturer’s weight guidelines and avoid placing heavy objects on the bed frame beyond its capacity.
Additionally, distribute weight evenly across the frame to minimize the risk of strain or imbalance. By being mindful of the weight limits, you can help keep your bed frame in excellent condition and enjoy a stable and comfortable sleeping environment.
Conclusion
Fixing a broken wooden bed frame is essential for safety and comfort. With the right tools and a bit of patience, you can repair most types of damage yourself. Evaluate the extent of the damage and your skill level to determine whether to proceed or seek professional help. Ready to fix your bed frame? Gather your tools and get started today! By following these steps, you’ll not only extend the life of your bed frame but also ensure a safe and comfortable sleeping environment.